

All
API Reference
Tutorials
Release Notes
On this page
Organizations
This guide covers the basics of managing your Organization within your account. We'll show you how to edit your Organization's details, invite team members, assign them specific roles, and edit or remove members from your Organization.
Organizations for Owners
If you are the first in your Organization to create your Qencode account, you will be automatically set to the Role of Owner. As the Owner of the Organization, you will:
- Have access to all pages
- Can add, remove, or edit the roles of members in your Organization

Note
Organizations can only have one Owner. A new Owner can be assigned by changing a team member’s role to Owner.
1Enter your Organization's details
- During the account creation process: Fill out the Organization Name field on the Sign Up form.
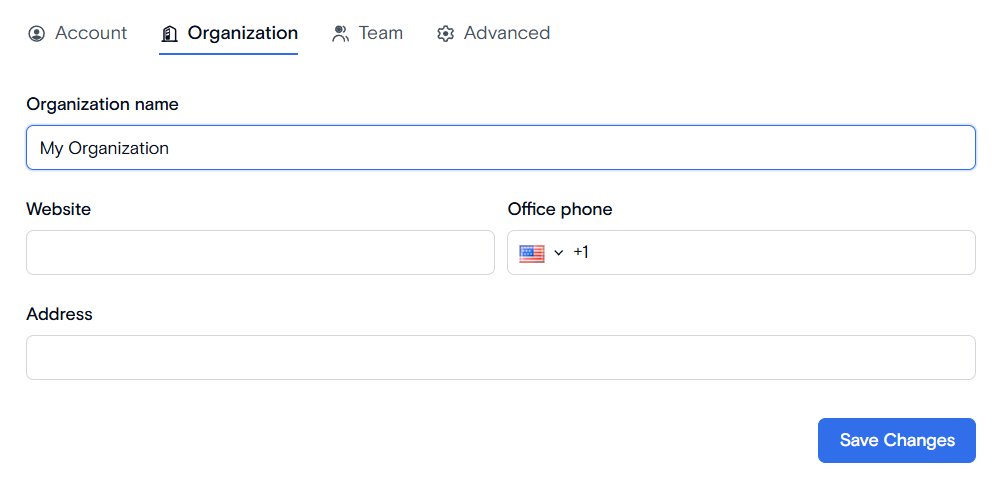
- For existing users: On the Settings page, you can navigate to the Organization tab to fill out the Organization name, Website, Office phone, and Address.
2Invite Team Members
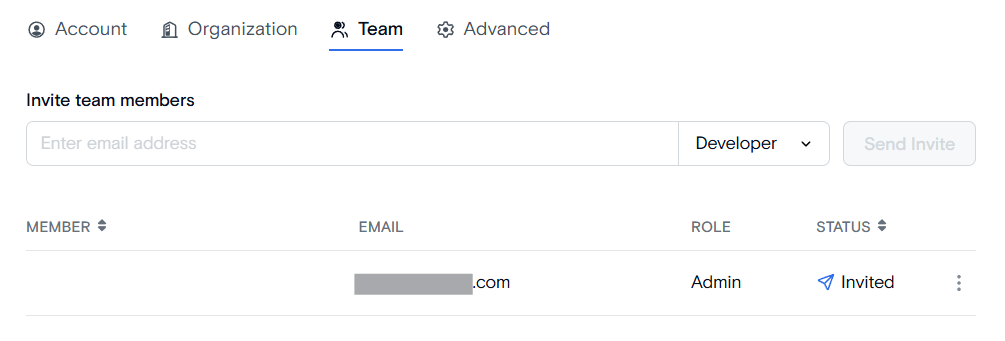
- To invite a team member to your account, go to the Settings page, navigate to the Team tab, enter the email address of the team member you want to add, select the role from the drop-down menu and click the Send Invite button.
- The team member will then appear on the table with the status “Invited”. After the member accepts the invitation and signs up, the status will change to “Active”, and the member's name will be shown in the Member column.
- Admin: Has access to all pages and can add, remove, or edit members.
- Developer: Has access to all pages except Billing pages.
- Billing: Has access only to Billing and Statistics pages.

Team Roles
3Edit or Remove Members
Note
Only Owner and Admin roles can edit member information and add or remove members from the Organization.
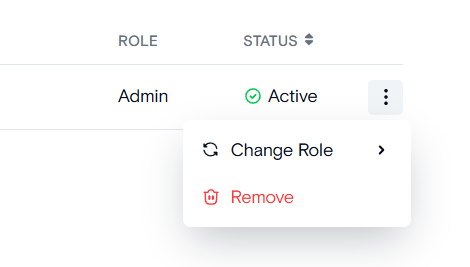
- On the table, click the three dots on the rightmost part of the table next to "Status" of the team member you want to edit or remove. Then click Change role or Remove, depending on which action you want to pursue.
Note
Users can only edit team members with an Active status.
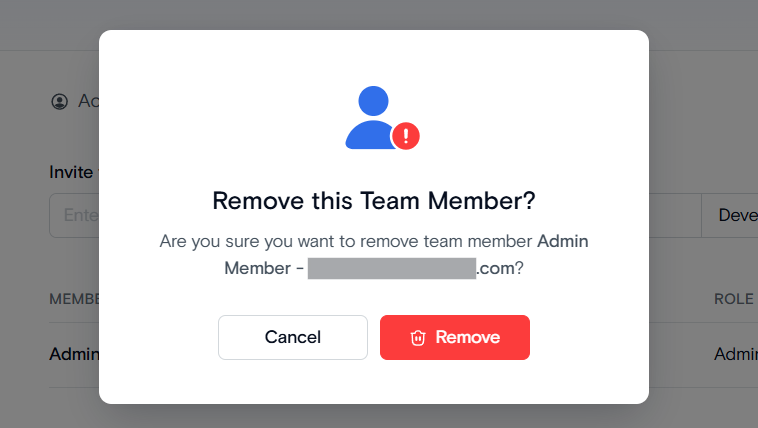
- If you want to remove a team member: A pop-up asking you to confirm the member’s deletion will appear. If you wish to proceed with removing the team member, click Remove. The team member will be automatically removed from the table, and access to your Organization and its pages will be revoked.
- If you want to change role of a team member: A list of available roles and their access will appear after hovering the mouse on the "Change Role" option. Click the preferred role. Changes will be reflected on the team table and the team member's user profile. The member's access permissions will also automatically change to the new Role assigned.

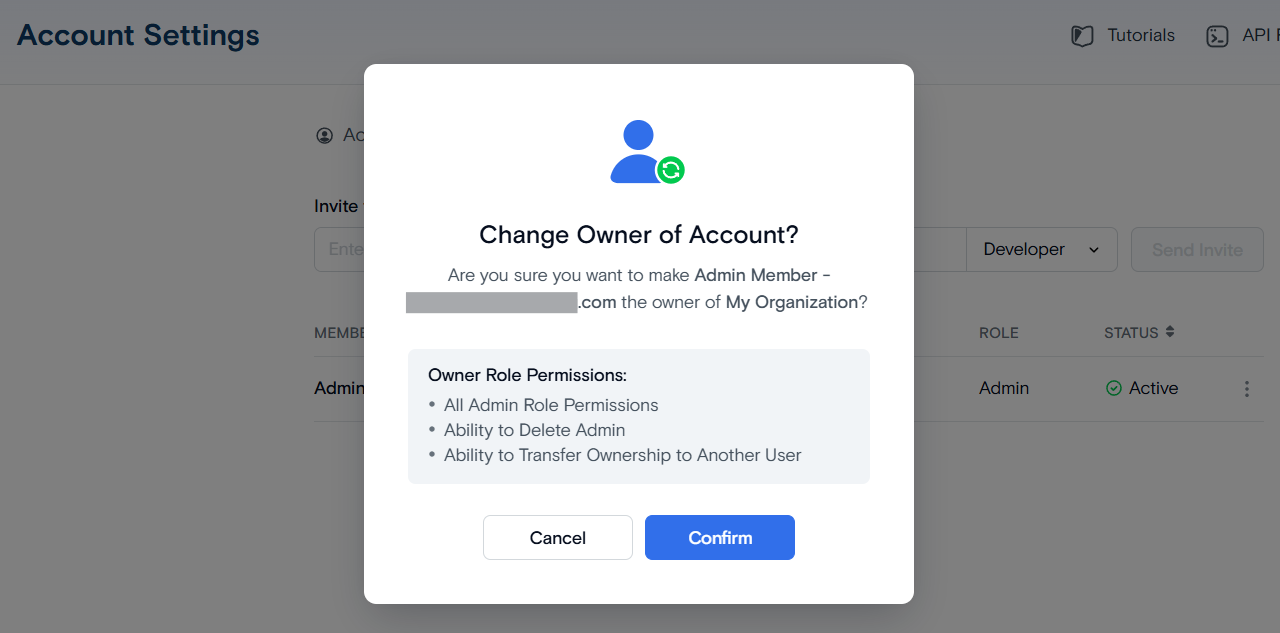
- If you want to change a team member’s role to Owner, a confirmation pop-up will appear. Once you confirm, the new Owner will be assigned, and you will need to sign in again. Your role will automatically be changed to Admin, regardless of the new Owner’s previous role.
Organizations for Team Members
Note
Members can't be invited to the Organization if their email is registered within Qencode. If you are a team member and not an Owner, do not register an account in Qencode yourself. Instead, wait for the invite email.
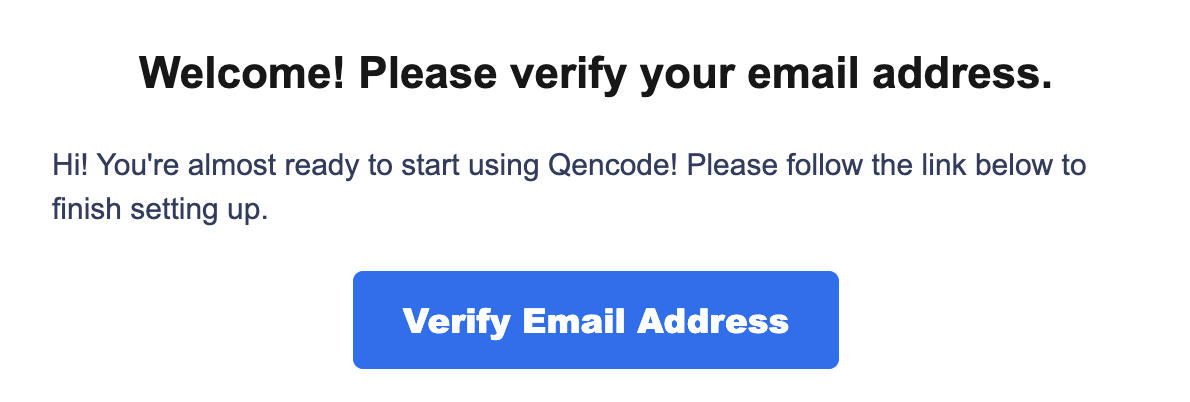
1Check Your Email for the Invite Link
- You will receive an email from Qencode asking to verify your email address. If you haven't received the email and your Organization owner has already sent an invite, check your Spam folder for the invite email or double-check that your Organization owner used the correct email address.

- Open the email and click the Verify Email Address button.
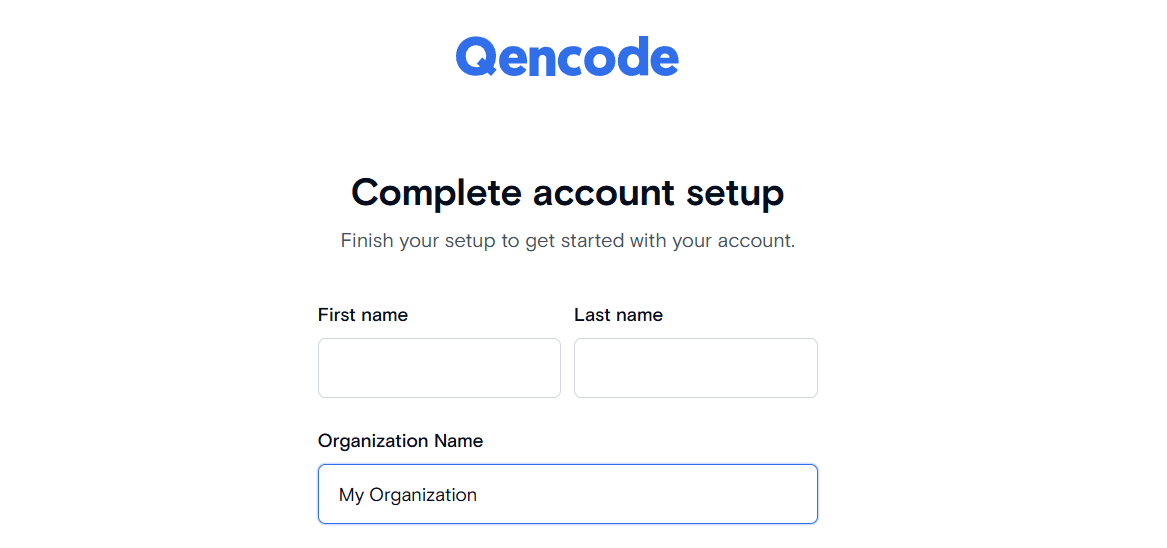
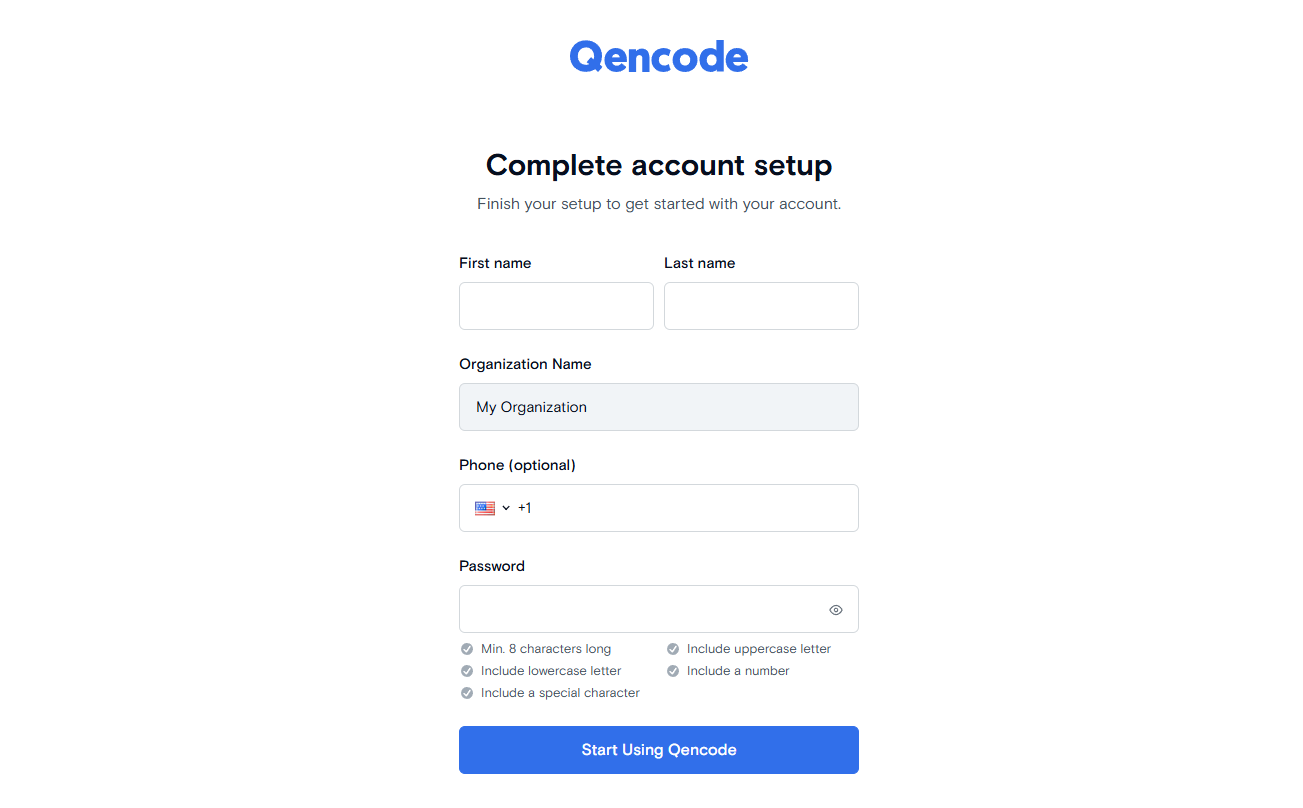
2Complete Account Setup
- You will be redirected to the Qencode website and asked to complete your account setup. Enter your details and click Start Using Qencode.
Need More Help?
For additional information, tutorials, or support, visit the Qencode Documentation page or contact Qencode Support at support@qencode.com.